Time from start to warm bread: 2hr40min
Type: Yeasted
Bake: 40 minutes at 365
Ingredient 1 loaf 2 loaves 3 loaves
Bread Flour 250g 500 750
Whole Wheat Flour 240g 480 720
Milk 225g 450 675
Water 80g 160 240
Honey 75g 150 225
Butter 2T ¼ c ¼ c + 2T
Salt 1 ½ t 1 T 1 T + 1 ½ t
Yeast 2 ¼ t 1 T + 1 ½ t 2 T + ¾ t
(Oats) 50g 100g 150g
(Wheat Germ) 25g 50g 75g
(Flax seed) 25g 50g 75g
(Molasses instd. honey) 25g 50g 75g
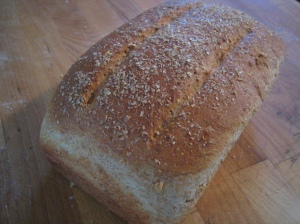
There is nothing like the smell of whole wheat flour baking. The toasting germ and its oil release a wheaty aroma and the bran is good for your system. What’s not to like? This is my standard wheat sandwich recipe that I’ve altered and adjusted for maximum flavor and workability. Most importantly it has good structure as it must stand up to the rigors of spreading crunchy peanut butter, which is my fail/succeed test for any sandwich bread.
The variations are merely a starting point so adjust as you like. My Scottish oat bread is this basic recipe with rolled oats (not quick oats!) and wheat germ. Whole grain oats helps lower cholesterol, says the friendly Quaker in the broad-rimmed hat, and the texture of this bread is mild with a toasted flavor imparted by wheat germ. Molasses flax bread uses ground flax seed for its incredible nutty flavor and healthy Omega-3 fatty acids, and molasses for a dark color and rich sweet flavor. With the additions in parentheses above, only the molasses is meant to be a partial substitute for the honey, the rest are additions to the mix. Ready? Off we go!
First, mix together all your dry ingredients, including the yeast, with a whisk in a large mixing bowl. For those whose grandmothers always proofed yeast in warm water or milk, things have changed. I’ve never had any problem direct-mixing yeast. In a glass bowl or large measuring cup, put your milk, water, honey, butter, and microwave for around 1 minute, to melt the butter and get the chill off. You want the liquid mixture to be body temperature (or as high as 110 if you have a thermometer). If the butter isn’t melted, no problem, it’ll be worked into the dough by your warm hands. Pour this into your dry mix and stir it around until everything is bonded together in a shaggy mass.
Now comes the lazy part! Your bread will partially knead itself in the autolyze process. Put your dough on the counter and leave it for ten minutes. Or twenty if you’re drinking a beer and catching up on celebrity gossip. Not that I do this.
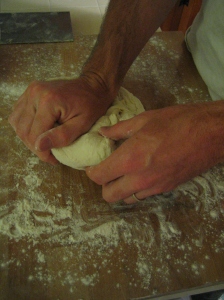
When you come back, you’ll find after the first few kneads that the structure is pretty strong. (With the Scottish oat bread the dough will be a little more dry. This is okay.) If you’ve never kneaded before, it’s way simpler and less scary than you’ve been led to believe. Fold the dough in half toward you then push down with the heels of your hands. Rotate 90 degrees and do this again. Fold, repeat, and work out all that stress.
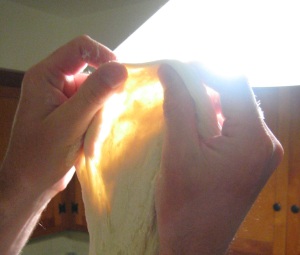
Knead for up to 8 minutes, or until you can windowpane your dough, which means you can gently pull it apart into a thin enough sheet that you can see light through it.
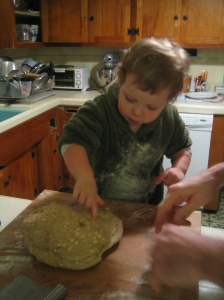
If it shreds and makes holes, knead a little more. If you’ve kneaded for 10 minutes, it’s probably fine. If your assistant wants to poke her finger in the dough, let her.
Tuck the edges into the bottom to make a nice dome, then plop it back into the mixing bowl to rise. I’ve given up on oiling the bowl or cleaning it out beforehand, since the dough never sticks that much and I’ve gotten tired of needlessly oiling and washing bowls.
Let it rise in a warm place until doubled, usually about an hour. Now is the time for gentle hands. Take the dough out and gently roll it into a cylinder, tucking the dough into itself on the bottom. Keep tucking until it’s as wide as your loaf pan. If you’re making multiple loaves, you can weigh out the individual pieces of dough (each one is around 1000g) or just eyeball it. Spray some oil into your pan then put the dough in, seam side down.
Here’s where you can impress your friends and feel like a real baker. Wet your hands and rub the top of the loaf to wet it. Get roughly a teaspoon of flax seed, chopped oats, or wheat bran, and sprinkle it on top of the dough. Gently press it into place so it doesn’t tumble off later. I use the topping to signify which kind of bread it is, but you can get creative. Just don’t put gummi bears on there. Please.
Cover the loaf pan with plastic wrap or a floured cloth and preheat your oven to 365. Now go finish reading about Lady Gaga.
For a standard loaf pan I find it’s ready when the bread is crowning about 1 inch above the rim of the pan, usually about 30-45 minutes. Just before you put them in the oven, get a lame or serrated knife and score the top of the loaf. I do two parallel vertical cuts about ¾” deep, but you can do whatever makes your tires squeal. I highly recommend scoring this bread as it springs well in the oven and will rip unpredictably without a score line.
I rotate my loaves halfway through the bake, at twenty minutes, both fore/aft and side/side. At forty minutes your bread should be done. If you want to poke a thermometer in there, it should read about 185. If you’re up over 200 it might be a little dry. If you’re up over 300, you’ve just made charcoal briquettes.
Let it cool at least an hour before eating, if you can wait that long. When it’s completely cool you can wrap it tightly in foil and freeze it. Or just nom away until it’s gone. Enjoy!
Update 9/22/10: I’ve come up with a new method of strengthening the flour: use a soaker! Check it out on this post.


I see you share interesting stuff here, you can earn some extra cash, your website has huge potential, for the
monetizing method, just search in google – K2 advices how to monetize a website